Why Chickens?

My photo
NH, United States
Last year, I bought a chicken coop that was made by someone that I love dearly and decided to raise some chickens. Well... we'll see how this quest develops as Spring fades into Summer and the chicks arrive in early June! Check out my YouTube channel www.youtube.com/fbideas for the most recent videos I've posted!

Monday, July 25, 2011

4 1/2 weeks and feathering out! At least most of them are

Most of the chicks now have names and they are content to be living in their new coop and run.  They are feathering out now and loosing the "down" that they were born with when the feathers start to come in and grow.

The Columbian Wyandotte's seem to be feathering out more slowly than the other breeds, and that has me concerned as to whether they're slower, or their getting picked on when I'm not looking.  Time will tell!

How we separated the hens from the chicks INSIDE the coop

Working in an 8x8 space isn't easy to separate. We built some panels to keep the hens with the nesting boxes and the chicks got the rest of the coop.
The hens have water and food inside their section of the pen and so do the chicks.  The chicks get to use the roost area and the hens have the nesting boxes.  I think the height is a little intimidating to them at times because they are laying eggs on the floor of the coop instead of in the boxes.

I thought Henrietta would be more bothered by the chicks than Gertrude, however Gerty is certainly more vocal towards them at this point.  She also is NOT HAPPY that THEY are using her ramp and door out to the run!  She is really stressed about this all.

It's been about 11 days now (it's already 7/25) since everyone is in the same areas of confinement and Gerty's eggs are either really soft shelled, or membrane only 80% of the time!  I'm hoping that once we get them all together and they haven't killed each other that her egg shells get harder again.  I'm not sure if stress can deplete calcium levels or not, but she's certainly off her game!

The rest of the story!

I feel like Paul Harvey.... actually I guess I left a few people hanging with my last post and they all wanted to know how the chicks did with letting themselves into the coop for the night.

They say Chickens "come home to roost" and even though the chicks aren't utilizing the roosts in the coop yet, they do successfully let themselves in one-by-one.  The hens aren't as lucky since they don't currently have direct access into the coop, so I only have to chase two chickens each night to put them inside instead of trying to herd a bunch of chicks!

Living with the Big Girls! 4 weeks old

Tour of the run and coop and how everyone gets into the chicken coop at night.

Thursday, July 7, 2011

Meet the 3 week old chicks!

It's amazing how these little chicks are being stretched and pulled this way and that and the once cute little balls of fluff are looking more and more like little tiny dinosaur like creatures!  Feathers are growing in from all angles and depending on the bird, at different lengths.  No two are alike which makes it kind of fun.

We've had to raise the feeders and water onto platforms because they keep scratching pine shavings into everything!

More than 1/2 of them have names now.  The Buff Orpington's, Buff Chantecler's and the Cuckoo Maran's are still hard to tell apart since I have two of each.  I can't go by size because it seems like from day to day they swap places!  Temperment and shyness seem to be the easiest for me to determine between the sisters.

The two Buff Orphington's are the sweetest and most gentle.  When I put my hand in the pen, they'll come right up and let me slide my hand under them and lift them out.  Of course, feeding them the "mealy worm" treat for behaving doesn't hurt :)  It's amazing how quickly they imprint the reward with the action!

The two Blue Laced Wyandotte's are now two different shades of blue feathering.  I've named the darker colored chick "Miss Blue" and the lighter one is "Missy".  They're right behind the Buff's for the worms, although I have to be careful when returning them to the pen since they want to fly back in on their own and from a distance theycan't see the deer netting I have over the top to keep them contained.

Wednesday, July 6, 2011

Day 8 - Changing the Brooder Bedding

This video shows the first time that I changed the bedding in the little chick brooder that I started out with. It's a good tutorial if you're going to be getting chicks, and shows how to apply the Diatematious Earth that REALLY has kept the flies and odors under control for us. 
This is becoming such a learning experience!

So Tiny the day they arrived!

This is Luna, the Blue Cochin, the day she arrived in the mail.  She was so tiny and her legs were covered with the same fuzz that her body was.

At 3 weeks old now, she is still as timid with us as she was the day she arrived.  For awhile, I was sure she was going to be at the bottom of the pecking order, but  she's holding her own with the rest of the girls.

This is Oreo, one of the Columbian Wyandotte's.  She is still the smallest of all the chicks,  but she is always one of the first to come to my hand when I reach into their pen.

She is the one that Sierra chose for her chick.


Meet Kyleigh's chick.  I'm not sure she's settled in on a name for her, but she is growing like a weed.  She's one of my "candidates" for the most dominant chicken.  She seems to keep watch over all of the others when I check on them during the night, and makes sure everything is OK.
This is Silver Lily, the Silver Laced Wyandotte, Eleora's favorite.  The markings that she originally had on her back that made her look like a duck are almost all gone.  She now is more black than brown and also she is getting very large.

This little Buff Orpington gave us a run for our lives on that first morning!  Before we captured her in the planter on my porch, she almost lost us in the tall grass and we had to find her quickly.

She is now one of the softest of the chicks and climbs up onto my hand willingly while pushing everyone else away so she can be the first that I pick up!

They all have such different personalities!  What a wonderful way to spend a summer!

Free Ranging is a GOOD thing!

Henrietta and Gertrude have been "free ranging" the yard for a few weeks now.  They LOVE being out in the yard hunting and pecking for worms, bugs and grazing on any variety of green grass and plant they want to try.

I normally wait to let them out of the coop until they have both layed their egg for the day so that I don't have to worry about eggs in the bushes attracting skunks or raccoons that would LOVE to have fresh eggs just as much as I do! These photos were actually taken by my friend Dee the day the chicks arrived a few weeks ago.

Henrietta is the lighter of the two hens because she has more white feathering under the red and she "rules the roost" even though there are only two of them together right now.  Her comb is also straight and Gertie's lists a little to the left.

I have to laugh when she "body checks" poor Gertrude when they get treats.  Oddly, they aren't using the roosts in the coop right now.  They still tend to snuggle together on the floor of the coop in the corner nearest the door and ramp into the run.  The only time they go up onto the roost is when they hear me coming down the driveway to feed them in the AM and to open the door so they can come into the run.  They climb up so they can see me through the window.

Their favorite treat is when I give them "mealy worms"!  I have them in an old peanut butter jar and it doesn't matter where they are in the yard....when they hear that "shaking sound' they come a running.  My Granddaughter's aren't too sure about picking up these dehydrated worms, but the girls sure like them!

Monday, July 4, 2011

Day 5 - Chick Camera

I LOVE THIS MOVIE!  How can you resist these little girls?  They are so curious looking into the camera and wondering what new thing they're seeing today.  The chicks are getting stronger and larger by the day!

Just so we could see what they look like to each other, I used my Flip Video camera and took this movie. Fast little buggers aren't they?

June 17th - Day Two brings More Paper Towels

All the books I read said to make sure you cover the wood shavings with papertowels the first few days because the chicks won't know the difference between their food and their droppings.  I have to admit that I thought "yeah right", but it's TRUE!!

I do know one thing.... I'll be glad when this phase is over!  It looks good for about 30 seconds and then someone does their business and it's all over except the cleaning up!

June 16th - Many Visitors, Adoptions and Names!

My friend, Dee, was the first visitor to see and photograph the chicks.  Dee took numerous photos of the new chicks and also Henrietta and Gertrude that are AWESOME and somehow my computer has "eaten" the files!  Will get those posted as soon as I get copies again.  They are so wonderful.  Dee paints in oils and her works can be seen at www.deelessard.com. Who knows... maybe I'll get the chicks first day captured in oils?

The next visitors were two of my Granddaughters, Kyleigh and Sierra with their Mom, Elizabeth.  They chose two of the chicks that they fell in love with, and I think they're going to be the two Columbian Wyandotte's.
These videos are so cute!  Sierra's chick settled right in quietly with her and she is now named "Oreo".  When they finally feather out, their heads and back ends should be black and the middle will be white.  Just like the cookie :)

Kyleigh's chick is a little bolder, no actually she's A LOT bolder!  Climbing and snuggling.  She kept heading for Kyleigh's hair and wanted to hide.  I love Ky's expression when she realized which end of her chick she was petting!

Notice the colored dots on the chicks heads?  That's to help Nammie tell which chick is who's!  They're all so similar right now, especially the yellow ones that I need help telling them apart.


After they left, two more of my Granddaughter's came, Eleora and Abegayle,with their Mom, Jodie.

Abegayle chose one that is going to become a Gold Laced Wyandotte.  Her name is MiMi, which is what the girls call me.  I'm not sure which one is more afraid of the other, MiMi or Abegayle!


Eleora chose one that we keep saying "looks like a duck" with the markings!  She is hoping that "Silver" will become a Silver Laced Wyandotte.  I only have one of those and these two will become very similar yet so different.  Jodie renamed the Blue Cochin chick that I had fondly been calling "Fuzzy Butt" to "Luna".  I have to admit, it's a more dignified name than the one I gave to her :)

June 16th - Setting up the Water and Food

Before I left for the Post Office, I turned on the heat lamp in the brooder so it could come up to 95 degrees for the new chicks.  After checking for "pasty butt" a disease the chicks can actually die from, I put them into the brooder one by one and dipped their beaks into the water.  For the first 24 hours, I also added "Save-a-chick" which is a combination vitamins and minerals for new chicks and poultry under stress.  I guess being born and then bumping your way all around the country in mail trucks and planes could be considered stressful don't you?

June 16th chicks are here! Opening the Box

The chicks were shipped on Monday, June 13th, the day they were hatched, and I finally got them on Thursday, June 16th, at 6:00AM.

The post office called as soon as they arrived and when I got home I opened the box to see my new little ones.

They are so tiny!  Everyone made it without problems, so my "chicken adventure" is officially launched!

Tuesday, June 14, 2011

June 14th - Chick Ready

Everything is set for the chicks to arrive either today or tomorrow.  I had ordered the chick starter kit from http://www.mypetchicken.com/ when I ordered the chicks back in January.  It included 10 panels that are 24 inches high that have slots in them so they fit together and they recommended that most people start with 6 panels when the chicks arrive. 

After putting them all together to see how big the pen was going to be once the chicks start to grow, we decided that 6 seemed more manageable to maintain the starting temperature of approximately 95 degrees.

The garage floor is covered with plastic, then there is about 2 inches of the pine shavings for cushioning and for the first day or two it will be covered with paper towels so the chicks don't slip around too much.  It also will allow them to find their food more easily until they recognize what it looks like.

In the beginning, the most important thing will be water as I unload them from the shipping box.  If you look closely in the photo, you'll see that I've added rocks into the tray so that if they fall asleep while drinking, they don't drown!  Sounds terrible, but I guess it does happen.  Then once they've all figured out how to drink and where to find it, I'll start to put down some food on the paper toweling and see how that goes.  All I need now is the chicks!

Saturday, June 11, 2011

June 7th - Roof for the chicken run

DRAT!!
We found another use for that foolish blue tarp!  Actually, believe it or not, we went out and purchased an even BIGGER one!
Eventually, the roof for the run will be poultry wire with maybe some shade cloth of some sort over a portion of it, but we've run out of oomph!
We've secured it with bungee cords temporarily and there are 12 foot 2x2 stringers across underneath it for wall stability.
Now the hawks and owls can't swoop into the run and it'll keep out Racoons or other critters that might scale the hardware cloth walls.  It's amazing that you don't think about RAIN when you're doing something like this and it's been 90+ for the past two weeks!

Got to get this project done because the 13 baby chicks will be arriving on June 14th or 15th and that will bring a new level of OMG WHAT HAVE I DONE!  You'll actually notice that the past 5-6 posts were all done this evening, June 11th, so that I could catch everyone up on what's been happening!

June 5th - Chicken run erected and a New Roof

Bob and I got the side walls erected on Saturday after the hose was repaired.  Seems like all the weekends are running together as we draw closer to the finish line.

Sunday, our Son Jason and Genna arrived to put the shingled roof onto the coop.  It'll be nice to get rid of that big blue tarp that's been draped over the roof all Spring!  Jason also took the screws out of that string of windows along the top of the coop so that there could be more ventilation inside.  Now there is an open window on all 4 sides and it's a little cooler in there.

The shingles match the house since they were leftovers from when we built a few years ago.  I'm so glad that the roof is done and I don't have to worry about leaks into the chicken house!

Got to show you the before and after photos of this roofing job!  Thanks to Jason, another job is done by the Mission Man!  Check out his website www.missionman-nh.com, he does REALLY great work if you need a home handyman!

BEFORE New Roof

AFTER New Roof

June 3rd - 5th - Assembling the Chicken Run

Seems like forever since we stacked those panels against the side of the chicken coop, and "the girls" are getting tired of being out for the day in the dog cage, but the weather has been unusually HOT and humid this year and it's easier to move them into the shade that way.  90+ degrees is not fun when you're wearing chicken feathers.

We trenched out as deep as we could go with the backhoe on the tractor one night after work and got this far before we struck "our lawn irrigation system" in the last 10 feet!  That stopped the progress until we could get to Lowe's and get the goodies to repair the hose.  The good news is that it seems to be coming together nicely.

June 2nd - Planting seed potatoes in a shopping bag!

Not only am I concentrating on chickens, but I'm growing a garden as well.
I saw this technique on another YouTube video and thought it would work for us since the best thing we seem to grow on our property is ROCKS
I took a bunch of 99 cent recyclable grocery bags, cut holes into the bottom along the seams, cut pieces of nylon window screening to fit in the bottom and up the sides so the soil wouldn't fall out.  I then added 3-4 inches of organic garden soil, put the 6 seed potato slices on top with the eyes facing up and covered with another 2-3 inches of soil.  Next, I rolled down the sides of the bag to just above the soil line so the topsoil could get direct sunlight and watered until it ran out the holes I had cut in the bag.
Once the plants reach 5-6 inches tall, I'll add more soil to almost cover the plant and raise the sides of the bag each time until the sides are all the way up. The potatoes will grow off the stalk in the soil and when they're ready to be harvested, I'll just dump the soil and potatoes into a wheelbarrel so it's easy to find them.  More on this process as the days slip by.

May 28th - Building a chicken run so they can run

Hooray, it's the long weekend finally!  No rest for us though, we've got a run to build.  My husband is SO WONDERFUL!  He's engineered it so that we're creating 11 panels that will screw together.  That way, if one panel gets damaged we can remove it and put new wire in without dismantling the entire yard.  While Bob cut and assembled the frames, I painted on the first coat of white.  I'll do the second coat when they are all assembled together.


We built 3 smaller frames to go under the chicken coop and used 1/2" hardware cloth.  Before putting those on, we added several inches of "washed sand" under the coop and sprinkled DE onto that.  Hopefully, since it will be shady under there and a place to get out of the rain, this is where they'll choose to take "dust baths".  Next we added more hardware cloth UNDER the frames, added larger rocks AND then 3/4" crush run on top so it looked more finished.

Starting to look pretty good for a chicken coop! After 3 LONG days of working on this, we were both so tired we just couldn't bring ourselves to assemble it all.

Now I know why farmers go to bed so early!  They're wiped out from all the hard work!

May 25th - Rhode Island Red - Henrietta lays an egg!

After just a few days of having "the girls" on the back porch, we finished up securing the Coop so that no unwelcome visitors could get in and they couldn't sneak out!

I loaded up the coop with shavings, painted the roosts with DE (Diatomaceous Earth) to keep the bug population down, sprinkled it all over the shavings and into the nesting boxes as well.  I don't know if they have any lice or other varments living in their feathers (I haven't had the courage to look), but if they do... I firmly believe that the DE will cure them.

After hanging the water and food, the girls moved into their new digs.  I think they actually SMILED at me!  Right, I know what you're thinking...I'm smelling too much DE!  After just a few minutes in the deeper shavings, Henrietta started to scratch and circle into one area in the corner.  They'd been laying eggs in the dog crate in one corner so I picked her up and put her into a nesting box.  Look what happened!

You must admit... that is pretty cool :)  Talk about videotaping at just the right moment!

May 19th - From the Fire into the Frying Pan!

Look good don't they?  My first two eggs!  Yes, of course I can count... the bottom egg is a large egg from the supermarket.  I put it there to get a comparison of size for what my two little hens are laying.  Not bad! 

The thing I'm finding comical with all this egg stuff is that Gertrude lays a lighter color egg each day and just a little later in the day than Henrietta.  Henri's are always darker shelled, and slightly rounder than Gerti's.  It's actually fun to see which one has given me the latest gift.

 I decided to crack open the first two eggs the next morning and had them scrambled. Everyone keeps telling me that "fresh eggs" taste so much better than "store bought" eggs and I have to agree.  The texture is also different.  When scrambled, the fresh ones have a "firmer" consistency and aren't as watery as the ones from the store.

Sunday, May 22, 2011

May 20th - How to Clean and Disinfect a Chicken Coop

Since my coop was a "used coop", I have to make sure it's cleaned thoroughly before I put down the new pine shavings and move the Reds into it.  I haven't been able to find too much on YouTube or Google on this feat, so here's MY saga!

Since it was so filthy, I decided to to take some one's advise and use a power washer.  NOT a good idea!  You never know how small an 8x8 shed is until you get inside and turn on a power washer when there's loose chicken poop still there!  I think I'm going to be picking it out of my hair for the next week!

I had my muck boots on, which was good since after I dampened everything I was sloshing around in 1-2 inches of this watery mess!  The roosts were layered with dried poop, so I got a scraper and scrapped them down to bare wood.  I washed the walls and ceilings down with Clorox and water from a pail (not adding drastically to the depth of "Lake Judi Poopy".  The spider webs etc. came off the chicken wire when I was power washing, so at least that was easy.

The wet-dry vac sucked up all of the lake and then I went to work on the linoleum floor with the bleach and brush.  Sucked up all the water again and it was clean!


I then proceeded to sprinkle Perma-Guard Diatomaceous Earth onto the floor and into the nesting boxes in preparation for the pine shavings on Monday.

I still need to "paint" the roosts with a mixture of DE and water, but I'll do that later.  I followed the instructions from www.dirtworks.net which is where I purchased the product.  Here's the link to the instructions, which will open a Word document.

Once I got over the power washer mishap, it actually went pretty smoothly!  Thank God I was working with OLD chicken poop this time so there was no smell.

The girls also rewarded me again with eggs number 3 and 4! It's nice to know that at least for now they're laying every other day.  The size of their eggs are a little smaller than the large ones I buy at Sam's Club.  A few more chickens, and I won't have to be buying them at Sam's any longer :)

May 18th and 19th- How my life changed with a phone call

I was on my way home Wednesday night when I got a call on my cell phone from the local Agway store.  My two pullet hens have arrived 2 1/2 weeks early, and could I pick them up today?  I pleaded for more time and agreed to get them at 8:00AM on Thursday.

So, after getting over the shock of feeling like NOTHING was ready, I shared the news with Bob and got up extra early the next day.

I gathered the two large dog crates that Carl had loaned to me on Sunday, cleaned them well with Clorox to disinfect, and set one up on the back screened in porch.

I had no idea "how big" these girls were going to be, or if they'd be under stress from transport, so I put a vitamin supplement into the water, put out some food in the long feeder tray and some "poultry grit" into a dog bowl.

Next, I got two "cat carriers" out of the basement so I could bring them home, and away I went to Agway.

Yup, glad I brought TWO carriers, they were bigger than I thought they might be!  I picked up another few things that I thought I might need and we headed home.

The first thing they did was climb onto the red feeder tray and dumped out all the food!  OK, not a good choice of container, put in another dog dish!  They ate and drank so I was glad I had things on hand.

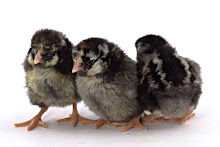
Laddy wanted to see what was going on, so I introduced him to "Henrietta" and "Gertrude".  Being an English Setter, he is OBVIOUSLY a bird dog!  Almost immediately after this photo, he decided to flinch at them, to see if he could get them to take flight.

AND HE DID!!
Henrietta took off in full flight, landing on Gertrude with a thud which made her spread her wings in defense and both of them flapping furiously to get away from either Laddy or themselves, proceeded to flip 75% of the pine shavings all over the back porch!

NOW I understand why I wanted that coop ready!  I cleaned up the mess, put the hens back into the cage and went to work for the day, knowing that I wouldn't be able to do anything to get the coop ready until at least Saturday afternoon or late Sunday!

When I got home, I checked to make sure all was well in chickenville, and was pleased when I found TWO eggs!  (There goes the theory that they need to have nesting boxes to perform!)

So, my two little Rhode Island Reds are of laying age and should provide me with two eggs every day or two from now on! 


Life is a beautiful thing!  Especially if I can keep Laddy off the back porch until the girls get moved into their chicken coop.

May 15th - Coop Moving Day!!!

The platform is ready for the coop finally and we're raring to go!  Bob and I got all of the prep work done and the rollers (metal tent support poles) under the shed and then called in reinforcements for help.

It was actually quite an interesting process, filled with self-doubt and wondering if anything (or everything) would go wrong?

In the end, it was done perfectly and the coop is now on the platform ready for final cleaning in preparation for the 20 week old pullets to arrive in June.

This video is about 13 minutes long and was created and posted on YouTube from "mini-clips" during the moving of the coop.  Check it out, it's amazing!  I never should have doubted that my husband and his friends had engineered this correctly :)


Thursday, May 19, 2011

Mother's Day Gift :) Coop Cleaning Day!

Sunday, May 8th, Jodie's family spent the day with us building the frame for the coop and cleaning out the remaining "muck" inside the chicken coop!  It's a crappy job, but someone had to do it :)

Actually, she and I worked together and got it pretty much done while the men worked on the "frame" to go underneath.

The girls played in the yard with Laddy and rode in the tractor bucket when I had to make trips back and forth for supplies.  It was GORGEOUS weather and so much seemed to get done.

Bob and J. Alan engineered the frame and we got it assembled and leveled.  It's a few inches higher than where the coop sits on the trailer, but we'll work through that when we're sliding it across on the "roller" that we're engineering.

May is here!

Spring Time is that marvelous time of year that you realize the faster you go... the behinder you get!

I don't know where the time has gone since my last post, but we're headed towards "Chick Day" faster than my brain can get itself around things!

The first weekend in May, Bob rented a "post hole digger" attachment for the tractor and dug all of the holes for the chicken coop platform and the chicken run. 

The house is 8x8 and the run will be 12x16. with a slight offset for a door entry into the run.  The row of center holes is so we can "pitch" the roof downward from the center and maybe cover it with a solid covering if needed for water runoff. 

We've decided to close underneath the platform for the coop with hardware cloth (wire) so they have a shady place to be and the entire run will be filled with 2-3 inches of sand.  Hopefully it will be easier to clean that way, but since this is my first chicken experiment..... we'll see!

Tuesday, April 26, 2011

Oh oh, sprinkler people are coming!

Got the call from our lawn sprinkler company last week scheduling the start of the seasonal turning on of the water! Oops, guess I needed to get more aggressive in asking my husband about planting that Hen House somewhere!

Easter Sunday, we staked out where we want the house to go, and how big a run I think they'll need. House is approximately 8 ft. By 8 ft. And we have staked out the run at 12x16. So, we're ready for them to come and start the system and pray that when we rent the post hole auger we don't hit any of the lines! Now that the outline is there, Anrik Irrigation will be able to adjust the sprinkler heads so I don't end up with a mud hole and damp chickens.

Bob is starting to work with me on this idea. He's still not crazy about it, but at least he's planning on digging holes this coming weekend, and we've identified how many potential days we have to work on getting ready! It's going to be close, but I think we can do it.

I continue to get encouragement from friends who think getting fresh eggs from us is a great idea, and others are starting to save egg cartons for me. When I went into work today, there was one sitting on my desk from a "carton angel"!

Monday, April 25, 2011

Jonathan Greene Corn Gluten

Been busy this month with getting the perennial gardens raked and thatching the lawn with the lawn tractor. Getting this past winter's grass mold stirred up in the wind got my allergies off to a good start . I went to the local Agway and picked up the milky spore so I can put that down in May for the grubs, and found an organic solution to the crabgrass and fertilizer kickoff program. Did you know that corn gluten will stop weed seeds (and grass seeds) from germinating? So, put down what I'm hoping is enough of a layer to retard the weed growth come warm weather. My dog LOVED it!! He thinks I put a snack ALL OVER THE LAWN for him! Lick lick lick, he likes corn! Likely we've had a few days of rain in a row, so it's turned into a liquid and is now feeding the roots instead of the dog. WHO KNEW!! I have to thank Paul from the Paul Parent Garden Club for telling me about the product on Palm Sunday! He did warn me to make sure I got it on BEFORE the chickens came, otherwise they would have the same reaction as the dog!

Friday, April 8, 2011

To weed and feed or not....That is the question!

So here's the thing.. I have over an acre of lush green grass that I mow religiously every 7-10 days during the growing season. Up until now, I've had a lawn care company fertilize and apply weed control to keep it that way and it's the envy of the neighborhood, heck maybe even the town!

Now what? I'm raising chickens for food/eggs and I don't want them eating anything that's going to transfer to me or my loved ones. Is chemical fertilizer safe? I'm thinking that if I stretch logic MAYBE the fertilizer could cut it, but DEFINITELY not the weed control. I know I have grubs (and so do the skunks in the neighborhood) and they're killing my grass from the bottom up!

So, enter the research on MILKY SPORE and DIATENACIOUS EARTH! I'm going to apply milky spore to the lawn and gardens to kill the Japanese beetle grubs for the long term since it takes a few years to kick into gear and will work for 15-20 years. The DE will work more quickly as the grubs will eat it in the soil and be destroyed in the process.

The other good thing is that I can use the DE as part of the treatment for mites, ticks, flea control for the chickens in their coop and dust baths. Pretty amazing stuff! You just have to make sure you use FOOD GRADE DE, not the stuff they use for treating swimming pools. It'll also cut down on odors when put in the bedding and shavings.

So, the grass is going to go through transition this year as I get the grubs under control. In may have more crabgrass and dandelions, but I'll gain healthy chickens and ultimately a healthier lawn.

Jerry Baker has some unique blends of household detergents and other items like mouth wash and tobacco tea that will green my lawn and gardens so even though they are more labor intensive than calling the lawn care company, they may be better for my plants.

Worth a try. What do you think? Have you already been where I am and what do you use?

Thursday, April 7, 2011

Silver Cuckoo Maran Chickens

Silver Cuckoo Maran's are also known simply as "Cuckoo Marans" and are considered "chocolate eggers," meaning their eggs can range from medium brown to a deep chocolate brown.

They are an ideal beginner's bird which is a gardener's friend.  They are a large, heavy, soft feather bird. 

They are busy, active, hardy birds who will eat all my garden pests (if I'm brave enough to let them free range!

Prince Charles of England owns them, and they produce up to 200 eggs per year on average.

Since I'm getting 2 of them, that means 400 chocolate eggs!

Hmmmm, I can feel the need to have someone buy my extra eggs coming on!

Wednesday, April 6, 2011

Golden Laced Wyandotte - I've ALWAYS loved Gold

Each feather is golden edged in beetle black!  The hens look as if they're starlets dressed in sequined gowns, ready for the red carpet and paparrazzi!

I like the subtle contrast between the gold and the black on these chickens.  They are, like their other sister Wyandottes dependable, energetic and faithful layers.

What more could a beginner want from a flock?

Tuesday, April 5, 2011

Silver Laced Wyandotte - An Original Variety

Silver Laced Wyandottes are the original Wyandotte variety, and a wonderful example of American breeding.

Wyandottes have an easy going nature with a heavy body and energetic and faithful layers.

Each feather is silvery white edged in beetle black.  The hens look as if they're ladies dressed for a fancy ball.

Until I saw this variety when I started looking at chickens, I never thought about how small or long each feather could be.  The black edging shows off each feather, one by one!

Monday, April 4, 2011

Easter Egger - I've GOT to have Pastel Eggs!

Isn't she cute?
They are friendly, great layers of large blue and green eggs, and (rarely) while, creamy brown or even pinkish eggs.

Their smaller body size makes them good in the heat, and their small pea comb means they do well in cold, too, because they're not susceptible to frostbite.  "Easter Eggers" are hybrids that carry the blue-egg gene of the true Araucana breed.

Because this is a hybrid variety, supposedly even if you have a whole flock of them, you can often tell them apart because they come in so many different colors.

There is no knowing what color egg my hen will give, although the egg color will not change from one egg being laid to another.  Each hen will give ONE egg color. So, if she lays a green egg, then I can't expect the next one to be pink or blue!

Sunday, April 3, 2011

Columbian Wyandotte - 2 more for the Coop


Are all chickens this cute when they're sleeping?

The Columbian variety is a more uncommon variety of the Wyandotte, and a wonderful example of American breeding.  These birds are beautiful AND productive.

The Columbian markings are striking: they are clean white birds with black tails and black dotted hackles.  The hens look as if they're garbed in a stole of heraldic ermine, with a black chemise peeking out from beneath their argent gowns!

The hens are hardy, energetic and faithful layers.

Saturday, April 2, 2011

Buff Chantecler Chicks - Canadian x 2


Chanteclers are the first-ever Canadian breed, and were developed for good egg and meat production and hardiness even in the coldest of winters.  Toward that end, they're on the chunky side with extra-small combs and wattles.

The way these two chicks are huddled together, it looks like it was cold when they had their photo's taken!

Since my ancestry is from Canada, I couldn't resist seeing how these chicks will  grow up!  I wonder if they'll chirp or converse in French?  Could get interesting around the chicken coop.

Friday, April 1, 2011

Thursday, March 31, 2011

Blue Laced Red Wyandotte - Another 2 for the road!

Looking over the list, most of the chicks I picked will be Wyandotte's.  They are a favorite amongst backyard flock owners for their dependable egg laying, easygoing nature, and cold-hardiness. 

This cool and rare variety of Wyandotte is very new in the United States.  Apparently, these chicks will hatch 50% blue laced, 25% splash laced and 25% black laced due to the genetics of the blue color.

I love that they are so "puffy" looking.  It'll be great in the winter, but I'm going to have to remember to make sure they have plenty of shade during the hot summer days. 

They remind me of square dancers with the big puffy hoop skirts!  The outlining of each feather in the light blue color is just so striking.

Bantams or Standards - Which size?

OK, so now you're starting to see a pattern... So many choices, too many chicks so I chose either one or two of each breed that I really liked.  Actually, there were many, many more that I fell in love with too, but once I started ordering I decided not to get any of the bantams because they are smaller than the standard breeds.  I decided to pay attention to the natural "pecking order" of chickens and not get any that might start out with a size disadvantage.

Much to my dismay, that eliminated some of the really FUN chickens that I saw at the Deerfield Fair like polish and silkies.  They're smaller and apparently not as cold hearty so that was that.

Buff Orpington Chickens - I'll take 2 please!

Buff Orpington Chickens
Orpington's are known for being docile, feathery, cuddly.  Happy foraging or in confinement, pretty hardy, reasonable broodies and good mothers.  I'll have to be careful that they don't get bullyed from the other breeds.  The do not often fly due to their size and can be allowed to free range.  They are cuddly, docile and extremely child friendly.

I think they are beautiful.  They are supposed to have wonderfully soft feathers and I like it that they won't necessarily want to "fly the coop".  I want to make sure that when they first arrive, I hold and cuddle my little chicks so when my Grandchildren come to visit, they will be comfortable with being held by little hands.  Orpington's have small combs on their heads so that they won't get frostbitten too easily and they lay about 200 eggs per year.  I've ordered two of this breed because I think they'll be a favorite with the girls!  I just hope they aren't twins so that I can tell them apart!